Overland vehicles require a way to carry drinking water, preferably a minimum of 10 gallons, or more. Ideally, for International Overland Travel, they will also have a reliable way to filter and treat water to ensure purity and removal of bacteria when only water of questionable quality is available for refilling.
I designed and built a custom drinking water tank, pump, filtration and treatment system that I’ve mounted underneath my Jeep Wrangler Unlimited. I’m going to keep this DIY article generic enough so it can be applied to any 4×4 vehicle, not just the Wrangler. This is a very involved project, and shouldn’t be taken lightly. At each step I’ll present the various options I considered, along with what I see as the pros and cons to each so you can design your own system to meet your needs. This article is mostly focused on how you will design your own system, rather than how to actually build it. Once you’ve made all the hard design decisions and bought everything you need, everything else is mostly just connecting it all up however you can make it all fit in tight spaces!
No matter what options you choose, this project will require hundreds of dollars, and likely many days of work by the time it’s all said and done. It might also require significant modifications to your vehicle, possibly permanently.
That being said, it’s also one of the best modifications I’ve ever made. Heading off the beaten path and knowing I have a huge supply of safe drinking water at the turn of a tap is a wonderful thing.
Design Considerations
1. Where to mount the tank:
The biggest decision is where to mount the tank itself, either inside in the cabin somewhere, or underneath the frame rails somewhere.
Inside Pros:
- No drilling holes in anything to run hoses
- No need to make a rock guard/skid plate
- (Maybe) No need to worry about anything freezing, depending on how cold you plan to get and if you’ll have the heater running
- You could also make the entire install removable without too much effort, so you could have it in for some weekend trips, and take it out for the weekdays.
Inside Cons:
- The tank will take up precious interior cargo volume, depending on your vehicle this could be a big problem
- The weight of the water will be higher which is bad in off road situations. If you do a lot of hard trails, think carefully on this point.
- Draining the tank could be difficult and/or messy
Underneath Pros:
- The weight of the water is absolutely as low as possible.
- The tank doesn’t take up any interior volume, which might also mean it can be bigger overall.
Underneath Cons:
- You need a space be enough for it to fit.
- Depending on where you put it, the weight could be very far back (i.e. behind the rear axle)
- You will have to make a rock guard/skid plate, and even then the tank is vulnerable to damage.
- You might have to worry about it freezing.
I am very limited on interior cargo space on my build, so from the very beginning I wanted to mount the tank underneath. I wanted as much water storage as I could physically fit in the space available, because that will likely be the limiting factor of how many days I can go without being back in a town for the trip I have planned.
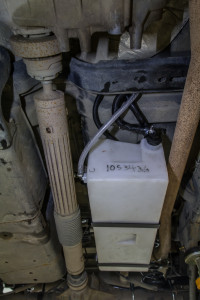
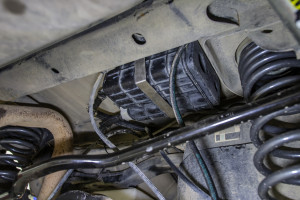
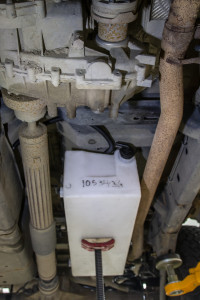
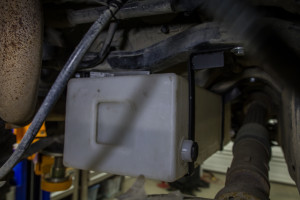
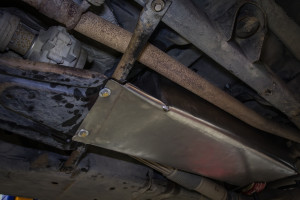
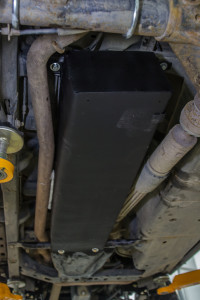
On the Wrangler JK Unlimited I relocated the Evaporative Canister further back (using a kit), opening up a large space between the exhaust and the driveshaft on the drivers side.
I like this location as the weight is very low, and is almost centred between the two axles.
It would have also been possible to relocate the muffler into that space, and mount the water tank where the muffler normally sits behind the rear axle. A tank of similar size would fit there, though I didn’t choose this route because I didn’t want the weight that far back, and modifying the exhaust was more expensive than moving the Evap Canister.
2. Custom made tank or generic?
It all comes down to price. Custom made tanks can be made to any size, meaning you’ll get the maximum possible amount of water storage for the space you have available. Be warned, custom tanks are around the $500 mark, where-as generic RV or Boat drinking water tanks can be had for $50-$150.
Either way, be certain your tank is drinking water safe!
3. Plastic or Stainless Steel Tank?
Plastic is lighter, stainless is more durable. If you go with stainless make sure you read up on what is appropriate to clean the tank with to ensure nothing bad builds up in the tank.
I personally chose plastic because it’s lighter and I found the size I needed.
4. Do you require filtration and/or treatment?:
For a vehicle staying in North America, I’m not sure I could justify the extra expense and complexity of a filtration system. 99.9% of all tap water is perfectly drinkable, as-is water from lots of mountain streams. When in doubt I’d add a teaspoon of chlorine to each fill up and call it good.
Given I’m going to Africa for 2 years, I wanted to have extremely high quality filtration to add an extra safety margin when filling up from water that is supposed to be “good”, with no guarantees.
You can never be too careful.
After experiencing water in Central and South America for two years on the road, I would personally run very good filtration and treatment for that trip too.
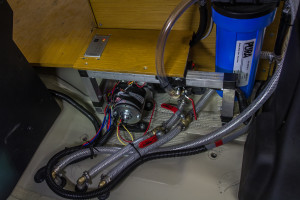
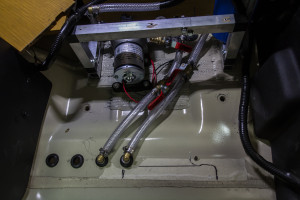
Completed plubming and wiring inside behind drivers seat. Pump, ball valves, wiring and filter and UV treatment on right
5. Do you require a pump?
Given the pump is cheap, and the convenience of having running water, I’m going to go ahead and say you do want a pump. Trust me, you won’t regret it. Getting water out of the tank with a hand or foot pump is certainly possible, though I never looked into it personally.
6. How do you want to fill the tank?:
There are a few different options here, that likely depend on where your tank is mounted, if you’re running filtration, and if you want to cut big holes in your vehicle.
Gravity Feed
You could just have a large diameter hose with a fill spout you physically pour water into, like older RVs. It would be your choice if the spout was inside the vehicle, or mounted to the outside with a locking cap like those older RVs. Mounting it outside might require some big holes to be cut, and I’d personally want a locking cap on it if I went that route.
Suction using the pump
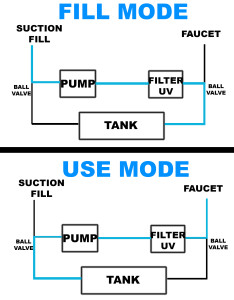
If you’re running filtration, it’s likely you want to filter the water before it goes into the tank. I designed my system so that water is sucked in a suction hose, through the pump, through the filter and UV treatment, then into the tank.
On the way out of the tank it goes from the tank, through the pump, through the filter and UV treatment and finally out a faucet for use. This system is working well so far.
7. How do you want to use water coming out of the tank?:
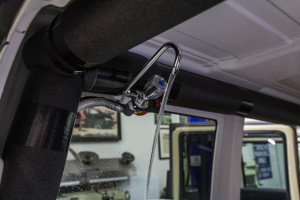
I personally have a regular faucet mounted in my Jeep, and I’ve also seen Overlanders that have a spray nozzle on the end of a flexible hose so they can spray thing outside their vehicle. Both have their uses, and I might wind up running both so I can choose which to use for what purpose.
8. Do you want a depth gauge?:
There isn’t much point having a tank if you don’t know how much water is in there. If the tank is inside and clear enough, you might be able to see it to estimate how full it is. If the tank is underneath, it’s going to be very hard to know how much water you have without a gauge of some kind.
Hopefully you are starting to get a picture in your head of what you want your water system to include, and how it will function. Read on to see how I made mine, which will likely further help clarify your design.
Things To Buy
- The water tank. Get your maximum measurements ready and start looking! I spent at least 50 hours on Amazon, eBay and RV and Boat water tank websites, scouring to find a tank with appropriate dimensions. If you’re mounting inside, it’s very hard to beat the Front Runner tanks, which are designed specifically for this purpose. Remember to look at RV and boat catalogues / websites. Scour the size options at the following sites: Amazon RV Water Tanks, GreatLakesSkipper, Ronco-Plastics, eBay, West Marine, Plastic-Mart
- A 12v pump. I went with a Shurflow 3.0 Revolution. These Shurflow pumps are the standard in RVs, so they’re super reliable. It pumps 3 gallons per minute, has a built in 55psi pressure switch and draws 7.5 Amps at full load. It’s also a lot cheaper than other options. It’s very quiet too. Standing at the back of the Jeep, I often am not certain it’s running, other than the water coming out.
- A filter and water treatment system. I went with an all-in-one Pura UV 0.5 micron filter that has a built in UV lamp that runs on 12V. It’s expensive, but I’m sure it will be worth it.
- A strainer for the pump – you need one for warranty and it’s good insurance against damaging the pump if you happen to suck up something large. Get a couple of ShurFlow elbows too – they really help when putting the pump in a tight space.
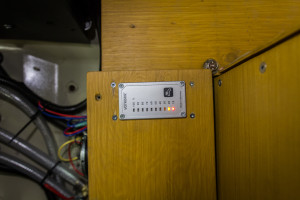
- A depth gauge. After tons of research I went with an electric system from Votronic. It consists of a sending unit in the tank, and a gauge. By sensing the conductivity on the electrodes, it very accurately measures water depth, and therefore tank fill level. The gauge updates in real time so it’s great to watch while pumping water into the tank.
- Hose to join everything up. I went with Braid Reinforced 1/2 inch so it would be very durable
- Hose clamps. Buy three packs, you’ll use them.
- A faucet, or something to get the water out. I went with this Skadvik one because it’s high quality but not too expensive.
- Brass elbows. Again, but a couple of packs, you’ll use them.
- Brass Tee junctions. My design uses 2 to divert the water from “fill” mode to “use” mode.
- Ball valves. My design uses four to be able to switch between pumping water into the tank, or pumping water out of the tank.
- Rubber grommets. Anytime a hose is going through a hole, or might rub on something, use a grommet.
- Depending on your tank, you’ll likely need plugs and adapters for the various threaded holes that will be on the tank. Amazon has tons of options, mix and match to your needs. Everything needs to eventually be at 1/2” to fit the hose.
- Hangers for the tank. I’ll leave this up to you based on what you’re making and where you’re mounting it. I bought straight steel straps then cut, bent and drilled them as required.
- Steel for a rock guard/skid plate. Depending on how strong you want it, pick your thickness and attachment method. The size of your tank and how it ties into whatever else is under your vehicle will determine the size of steel sheet you need. Remember, the thicker it is, the heavier it will be, and the harder it is to work with for bending, drilling and welding. Mine is actually quite thin, and more like a rock guard than a skid plate.
Jeep Note:
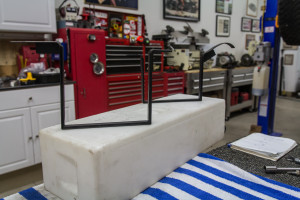
For the Jeep JK Unlimited with 3.8 gas engine and stock exhaust I used a tank that is 30.5” long, 6” high and 10” wide. That is absolutely the widest that will possibly fit between the exhaust and driveshaft (even 1/2” more would be too much – it’s extremely close to the exhaust), and it hangs exactly as low as the stock gas tank skid. It could in theory be quite a few inches longer for extra volume, but I couldn’t find a generic tank in that size. If I had a custom tank made, I would have made it longer, but not wider or taller. Double check the measurements for the 2012+ 3.6 gas engine, I think the stock exhaust is different in that area, possibly limiting space.
The exact tank I used is no longer in production, unfortunately.
Tools Needed
Mounting the tank inside only requires basic tools like screwdrivers, sockets, and some wiring stuff to get power to the pump. You might need a drill to mount the tank, pump and filter, depending on where you’re mounting it.
Mounting the tank underneath is much more complex and requires the ability to cut and weld steel, drill holes in your vehicle, etc.
Step 1: Prepare the Tank
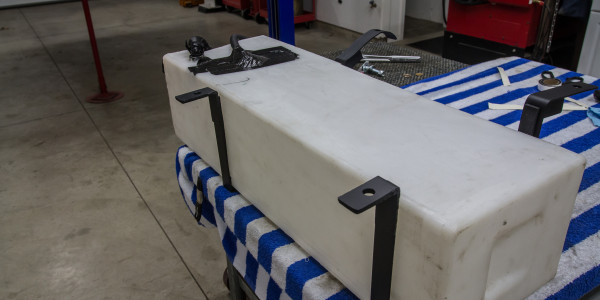
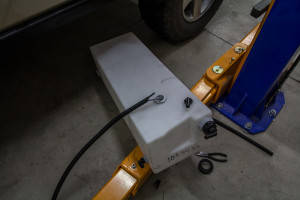
Install plugs and adapters on all the threaded holes in your tank. I have a “water out” on the bottom-side edge, “water in” on the top-front edge, and a “breather” on the very top surface. I wanted a breather to make sure I don’t pressurize the tank when filling, or cause suction in the tank when taking water out. The breather is also used as “overflow” when I’m filling the tank. My tank had one other large threaded hole at the back that I put a plug into. It can be used to drain the tank for cleaning if that is required.
Step 2: Install and Calibrate The Depth Gauge
Install the depth gauge sending probe into the top of the tank. It’s recommended to go near the middle so it gets an accurate reading on the water depth. Cut the two probes to the correct length, then calibrate the readout with the adjustment on top of the probe. I found it easiest to fill the tank, then adjust the dial until the readout said 100%. I watched the gauge go down as I emptied the tank to make sure it was accurate when near empty too.
Step 3: Mount the pump, filter, etc.
Find a location where everything fits and mount it all. I drilled straight through the floor and bolted everything down to that, right behind the drivers seat. Make sure all your hoses can route where you need them too (inc. all the ones to/from the tank) and that your wiring will reach. Drill holes to route the hoses that will go to/from the tank.
Step 4: Mount the Tank
If you’re putting it inside this should be relatively easy, and hopefully you can pickup existing bolts/threaded holes in your vehicle.
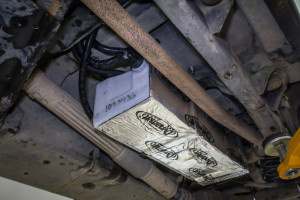
When mounting underneath you’ll have to consider how you want to hang the tank, where the hoses will route up into the cabin, how to protect the tank, and if you need heat shielding on the tank. Put foam weather sealing on the straps and anything else that will directly contact the tank to give it a little cushioning.
Step 5:
Connect all the hoses and the wiring and test out the system. Now is the best time to check for leaks, so fill the tank and test it out. Double check all your connections for leaks, and check the depth gauge works as expected.
For wiring, I have a 12v switch near the pump I use when filling the tank, and another switch near the tap I use to turn on the system when I want water out of the tap. The switches are wired in parallel, so either one can be used to turn on the system at any time.
Step 6:
Make the rock guard / skid plate. Now you know it doesn’t leak you can make the rock guard and cover it up. I put Dynamite on my tank to protect it from the heat of the exhaust which is close.
That’s it! enjoy your new drinking water tank!
-Dan Grec
http://theroadchoseme.com
