Installing a dual battery upgrade in the 2012 Wrangler JK can be tricky.
As many of you may know, when Jeep installed the new 3.6 Pentastar V-6 into the 2012 Wrangler, the under hood space became quite limited. Finding room to mount a dual battery upgrade with a second full size battery looked impossible. Looking under the hood there doesn’t seem to be any available space. Well that is going to change.
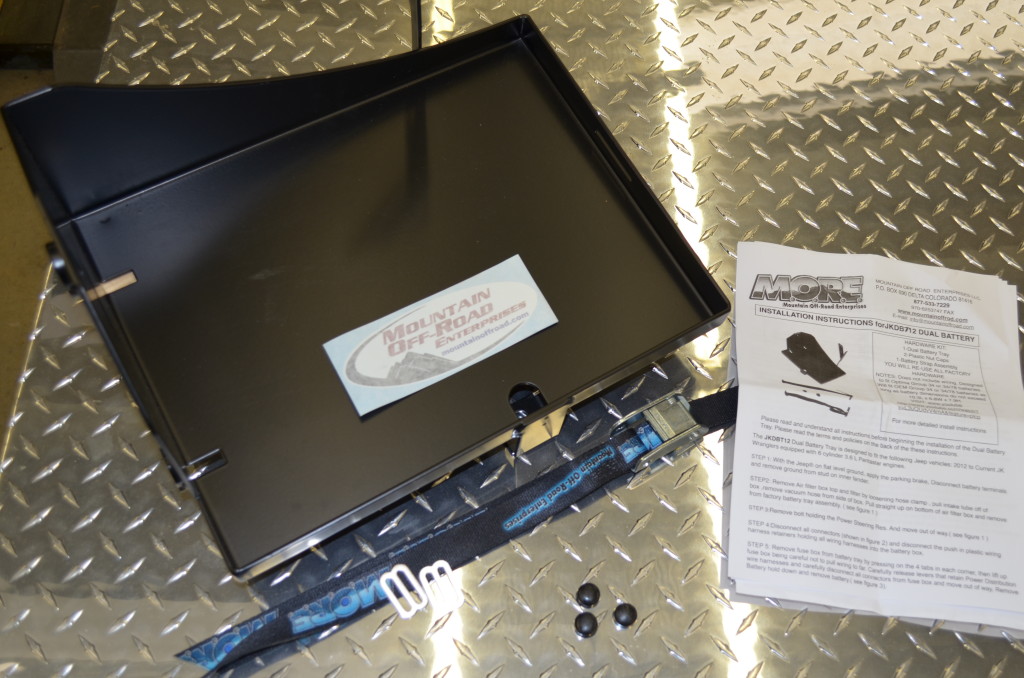
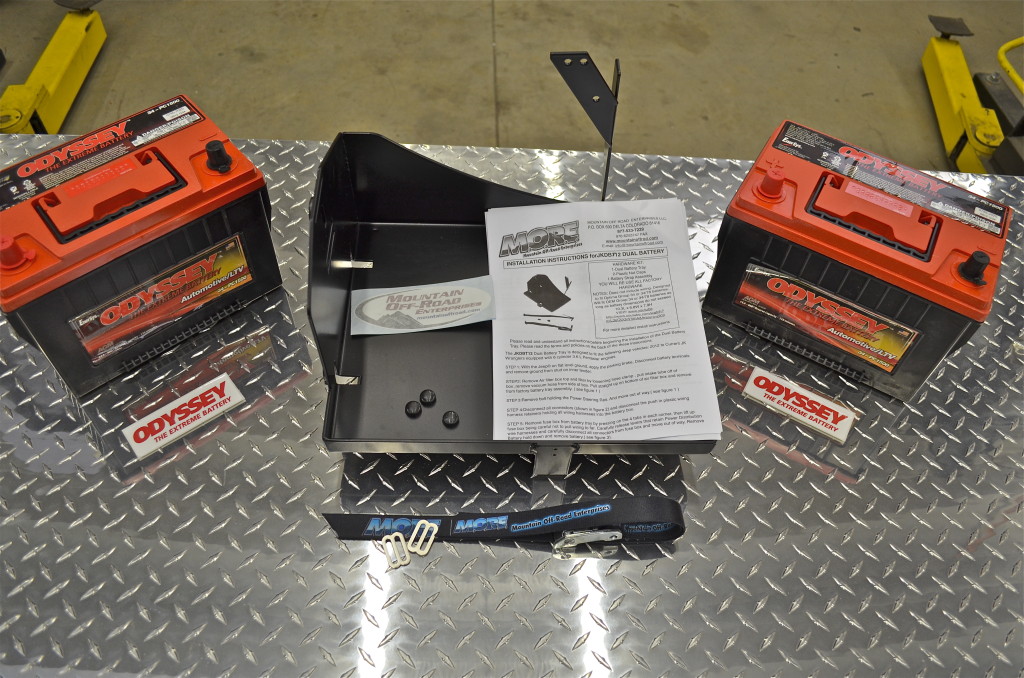
Thankfully the team at MOUNTAIN OFF ROAD ENTERPRISES, or M.O.R.E., came up with a solution. Their dual battery tray allows for mounting of two group 34, or 34/78 batteries, side by side in the stock location.
The kit includes the new tray, a heavy duty strap with metal buckle, nut protectors, and detailed instructions.
** It is worth noting that if you have an aftermarket air intake box that is bigger than the stock box this may not work for you. Space is very limited. **
M.O.R.E. has a great video series to help with the installation of the battery tray. The videos provide step by step instructions to make the installation a snap.
Here we have removed the stock battery, air filter box, and moved the power steering reservoir.
Next we removed the fuse box. Four small screwdrivers help to hold the clips open so we can lift it up. There are several large plugs on the bottom of the fuse box. Take care when releasing the locking connectors and label them so you can get them back in their proper location.
After removing the bolts that secure the factory tray in place. We carefully fished the tray out. Take care not to force anything and work the wiring around to make room.
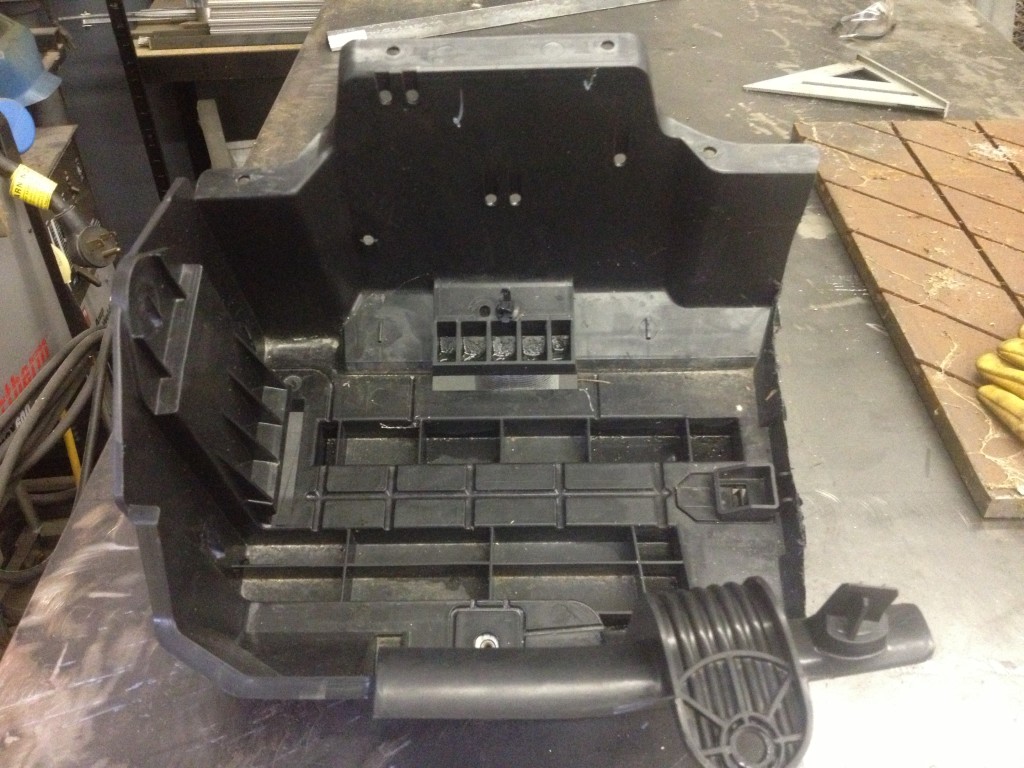
This is the section of the stock tray that needs to be removed. Be careful and do not remove or damage the posts that the fuse box attaches too.
The M.O.R.E. battery tray installs easily to the three studs on the firewall and one bolt through the bottom. The excess length of the studs on the firewall will need to be trimmed off and covered with the supplied plastic caps. Now after elongating the mounting holes on what is left of the stock tray, we reinstalled it, along with the fuse box, power steering reservoir, and air filter box. We also had to move the vacuum accumulator. This is covered quite well in the instructions.
*After some rearranging the stock battery cables easily reach the new battery. if you do not plan to install a dual battery controller right away, you can still use your jeep with the stock cables on a single battery.*ODYSSEY BATTERY
We have created the space now we needed to install some high quality batteries to power our JK. We wanted batteries that could handle the demands of winching, lighting, and deep cycling of our refrigerator. For our application we chose two ODYSSEY 34-PC1500s. With 850 cold cranking amps, 135 minute reserve capacity, and ODYSSEY’s sealed AGM drycell design, these batteries will give us years of great performance.
ODYSSEY Batteries are available in a wide range of sizes to fit many applications. Powersports, Marine, Auto, and even Heavy duty commercial applications are all available from ODYSSEY BATTERY.
Nation Luna Battery Management System
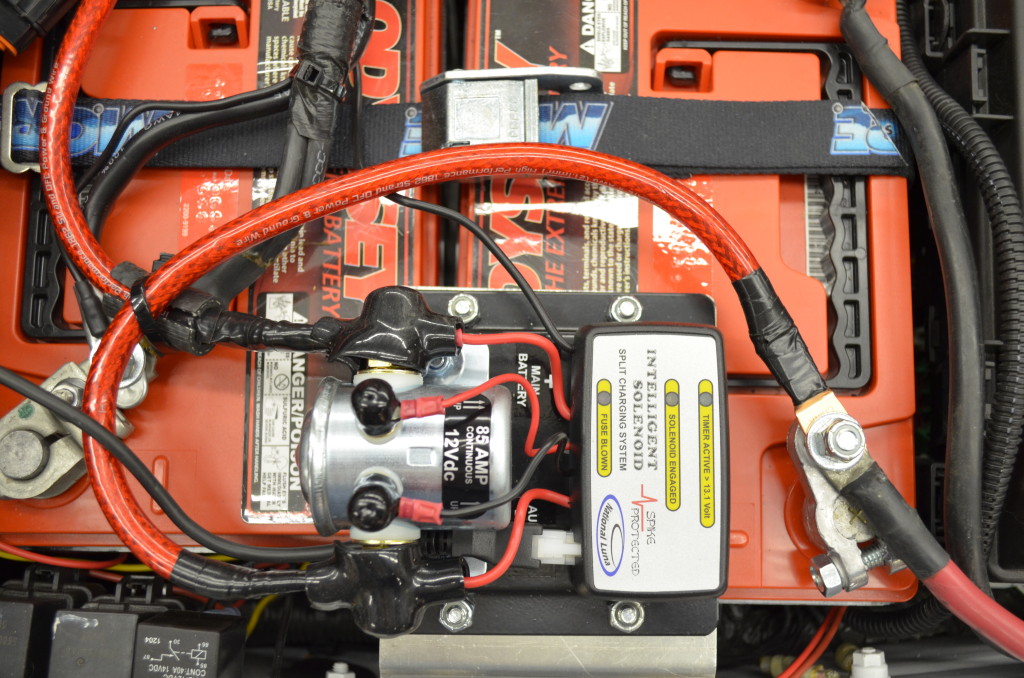
Available from Equipt Expedition Outfitters, The National Luna Split Charging System provides a high tech solution to dual battery management. The intelligent solenoid monitors and manages the charging of both batteries while the vehicle is running and then isolates them once the vehicle is turned off. All of this is done automatically.
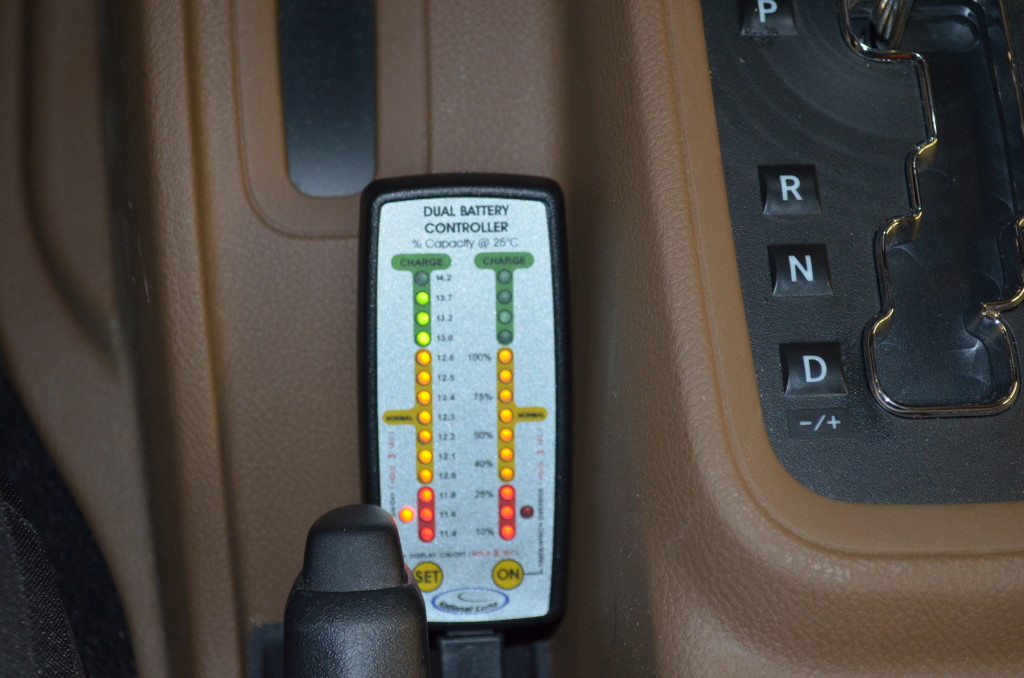
We added the Dual battery Controller to allow in-cab monitoring of the batteries and manual override of the solenoid for self jump starting.
Although there is a complete kit available we chose individual components and sourced our wiring locally. (We had the wire already.)
With the limited space under the hood of our JKU we had to fabricate a bracket that attaches to the fender to mount the Intelligent Solenoid. There is a rubber bumper on the underside of the plate were it rests on the top of the battery. We carefully routed the wires according to National Luna’s Directions, and after cycling the key the solenoid came to life and performed according to the specifications.
The Intelligent Solenoid charges the main battery on a 5 minute time delay after start-up. Once it times out the solenoid closes and brings the second battery into the charging circuit. Both batteries now remain charging until the vehicle shuts down and the battery voltage drops below 12.7 volts. At this point the solenoid opens to isolate the batteries.
The optional National Luna Dual Battery Controller plugs into the Intelligent Solenoid with it’s own wiring harness. Cable routing, and mounting location, are going to vary greatly by users, but we ran the cable across the engine bay and though an existing grommet on the driver side bulkhead. We then routed the wire along the bottom of the dash and along the center console. We used a little double sided tape on the back and placed it just below the transfer-case shifter. This location allows easy access but is well protected and out of the way.
Now we have complete control of our new system and peace of mind when operating our power hungry accessories on the trail.
For more information about the parts used in this article please visit the following sites:
National Luna Dual Battery Controller – Equipt Expedition Outfitters
2012 JK Dual Battery Tray – MORE
AGM Batteries – Odessey Batteries


