All Jeep Wranglers need a lock for the hood to stop prying fingers getting at the goodies in your engine bay.
Bolt Locks make a lock specifically designed for the JK, and it uses your factory Jeep ignition key. It’s less than half the price of the official lock, so it’s an easy choice.
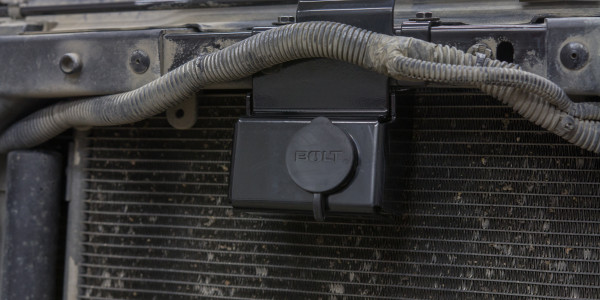
The Bolt Lock is extremely sturdy and works really well, I already love mine.
Things To Buy
- The Bolt Lock JK Hood lock
- That’s it!
Tools Needed
- A small flat blade screwdriver, or something similar to pry up plastic clips
- A big rivet gun
Step 1:
You need to train the bolt lock to work with your Jeep key. Get the key you use most, put it in the lock and turn firmly. This first turn takes a little more force than usual because the lock is “learning” your key. Cycle the lock a few times with the key until you’re sure it’s working.
Step 2:
Remove the Grill from your JK. There are 6 clips along the top holding it. Pry up the center of each clip with a small flat screwdriver, then pull up on the entire clip to get it out. Take your time, try not to break them. (If you do, the Bolt kit comes with replacements, so it’s no worries)

Remove the six locking plastic clips
Step 3:
Firmly pull the bottom of the grill away from the Jeep to release the push-in clips. I find it easiest to work from one side to the other. They’re stiff, so you have to use force.

The clips at the bottom just pull out using force
Step 4:
Unplug the turn signal wires on each side. The plugs have one of those little clips you slide, then you squeeze and the plug comes right out.

Unplug the turn signal connector
Step 5:
Sit the bolt lock in position, and insert rivets in all the holes that line up, then use the rivet gun to permanently attach it.

Rivet the hood lock in place
Step 6:
Reinstall the grill starting with the turn signal wires, then the bottom clips, then the plastic clips across the top. Make sure you press in the bottom clips that are right out on the edges near the turn signals – I find it easiest to look through from the wheel well to make sure they’re lined up and going in.
Step 7 (Optional):
If you’ve put mesh over your grill, you’ll need to trim it to give access to the lock. I used a pair of very small cutters and took my time to get the circle just right.

Bolt Hood Lock install complete with Grill Mesh
Step 8:
Enjoy your new hood lock!