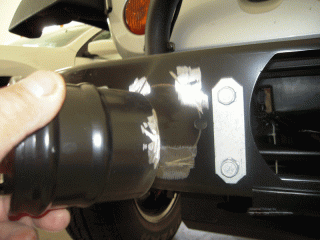
Now, remove the bumper again and take note of where the laser point falls on the steel frame of the bumper system. Make a permanent mark at the center and repeat this whole procedure for the left side of the bumper. You’ll find that you are going to have to remove and replace the plastic bumper several times throughout this project.
Now, you have centers marked on both sides, but just to make sure your marks (left and right) fall in the correct spot, measure over from the two slotted holes that hold the plastic bumper to the steal under frame. There should be 7” between the center of the pulling “tongue” and the edges of the slotted holes.
A friend who owns a machine shop cut and made up the two pulling tongues, cutting them from steel bar stock with dimensions: 1 ½” wide by 2 ½” deep by 6 ½” long. He drilled a 1” hole in each of the tongues and polished up the edges on a belt sander.
Next, I removed the four bolts from the right side that holds the outer steel bumper form to the actual frame. These are a “dog” to get out and require a breaker bar to loosen. Once they are removed, I made up two cardboard templates that included the bolt pattern and the location of where I wanted the pulling tongues to be welded.
Tape the patterns to the steel bumper frame and realign the laser. Hold the steal pulling tongues in place and make sure that this is where you want them to be located.
Next, I gave the two steel tongues and the cardboard patterns to my next door neighbor who took them into his shop and made up the two 3/8” by 6 ½” by 5” steel plates to which the tongues are welded. He also drilled out the bolt holes and milled out two rectangles where the tongues would be welded. Welding them from both sides of the plate and grinding the back to a flat surface strengthens their connection.
