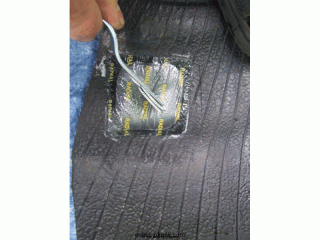
Step 5. Patching
Dry fit the patch over the area to be repaired. Mark out the corners of the patch on the inside of the tire using chalk. Apply rubber cement to the patch and the marked out area on the tire. Allow the cement to become tacky to the touch.
Put the patch on the inside of the tire.
Step 6. Stitching
Stitching refers to the physical bonding of the patch to the tire. The stitching tool looks like a pizza cutter, and it is rolled over the patch to get rid of any air bubbles and to press the patch firmly onto the tire. Roll the stitching tool methodically across the patch and down the sides. It’s a long process and isn’t complete until the plastic outer covering of the patch has started to detach.
With the patch firmly attached, the tire can be put back on the rim and re-inflated. The tire should be able to hold around 25psi.
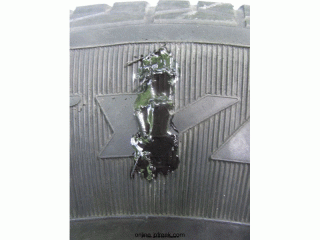
Step 7. Sealing the outside of the tire
To stop dirt from entering through the split, seal up the outside using Shoe Goo or equivalent flexible glue. Cover the entire split and the knots of the stitches. Allow the patch and outer repair to setup overnight if possible.
This emergency repair enables you to retain a usable spare, or a temporary vehicle tire. Any tire that sustains sidewall damage needs to be replaced as soon as practically possible.
– Special thanks to Martyn Davies of Adventure Trailers for his contribution of this article. To purchase the tools used for this repair, please click here.
* Published by JPFreek Jeep Adventure Magazine – The leader in Jeep and adventure enthusiast publications.

